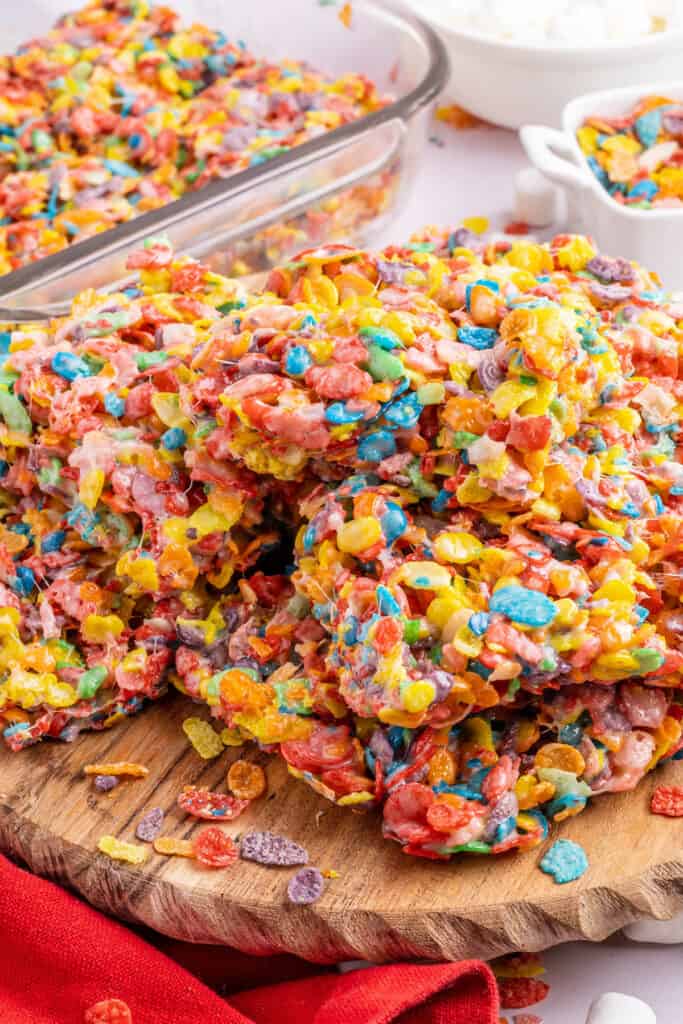
Fruity Pebbles Rice Crispy Treats are sweet and fruity with the gooey yumminess of the marshmallows! This no-bake dessert is easy to put together with the kiddos and takes just 10 minutes to make. The bright-colored cereal takes this traditional treat to the next level that everyone will love.

Fruity Pebbles Rice Crispy Treats:
The smell of these yummy and easy to make treats will take you right back to your childhood! They are so gooey and fun to eat, and the best part is, they only take four ingredients and ten minutes to put together! These are a fun one that your kiddos can come in the kitchen and help you make too. It’s a great no-bake dessert that’s nice to make year round, but especially in the summer when you don’t want to turn the stove on. I love no bake and rice crispy style treats! One of the first recipes we ever posted here are these Funfetti Oreo Crispy Treats, and recently our Smores Bars, they’re both so good and just as simple as these!
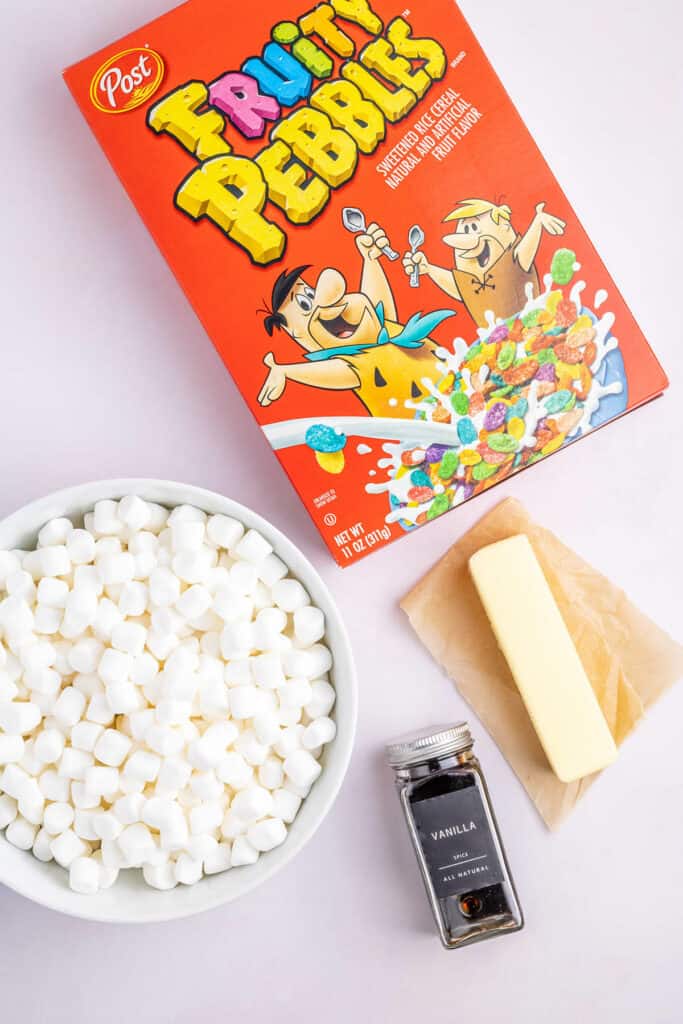
Ingredients For Fruity Pebbles Crispy Treats:
- Marshmallows: Make sure to use mini marshmallows and not the large or jumbo sized for best results.
- Butter: I use salted butter, but unsalted is totally fine here too!
- Vanilla Extract: Pure or imitation works fine. You can skip this if you don’t have it, it just adds a bit more flavor.
- Fruity Pebbles: I stuck with the name brand, however store brand should work too. You could also use the chocolate version for a different flavor!
How Do I Store The Leftovers?
You will store the leftovers in an air-tight container for up to 3-5 days. You can also store them in a flat layer in a ziplock bag with all the air removed. I have not tried freezing this recipe.
Why Are My Rice Crispy Treats So Hard?
Two factors come into play when this happens. Overcooking the marshmallows beyond the point of the marshmallows melting will result in a harder treat. The other factor is that you pressed all the air out of the treats when you pressed them into your pan. You want to softly press them down so they are level, but not press down so they lose height.
A Few Extra Recipe Notes and Tips:
- I have this recipe as serving 12 total. You can also cut into 16 or 24 squares to get more out of the recipe and make it go further if needed.
- Make sure to use fresh marshmallows for the best results! If your marshmallows have gone stale, the treats won’t have the same light and airy consistency.
- During the last step of mixing you can add an extra cup of mini marshmallows (whole not melted) and stir them in if you wish. This will give you bites of whole marshmallow along with the gooey mixture!
Enjoy!
~Nichole

Fruity Pebbles Rice Crispy Treats
Ingredients
- 8 Tablespoons Butter
- 16 Ounces Mini Marshmallows
- 1 teaspoon Vanilla Extract
- 11 Ounces Fruity Pebbles Cereal
Instructions
- Grease a 9 x 13 baking dish with the stick of butter and set aside.
- In a medium saucepan add your butter. Mix the butter on low to medium heat on the stove for 2-3 minutes or until melted.
- Once melted add the marshmallows. Mix for 3-4 minutes or until melted.
- Remove from the heat.
- Add the vanilla to the saucepan and mix until fully incorporated.
- Add the fruity pebbles to the saucepan. Mix until the cereal is completely coated.
- Scoop the cereal mixture into the prepared baking dish.
- With the spatula gently press the cereal mixture into the baking dish. Don’t press too hard as you want to keep the treats airy.
- Place the rice crispy treats on the counter for 30 minutes or in the fridge for 15 minutes or until cool.
- Cut into 12 squares.
Video
Notes


Thoroughly enjoyed this
it is very delicious. I made it with my cousin. It was so good and crunchy and flavorful I would recommend.
I just made these & I can’t wait to try them! You are my go to person for anything sweet, it all started with banana bread, thank you for inspiring me!
Perfect!
Good tip on the keeping the treats airy 😊 thanks!