Homemade Bread Bowls are so easy to make from scratch, at home with minimal ingredients! Learn step by step how to make this recipe to go with your favorite soup!
Bread Bowls:
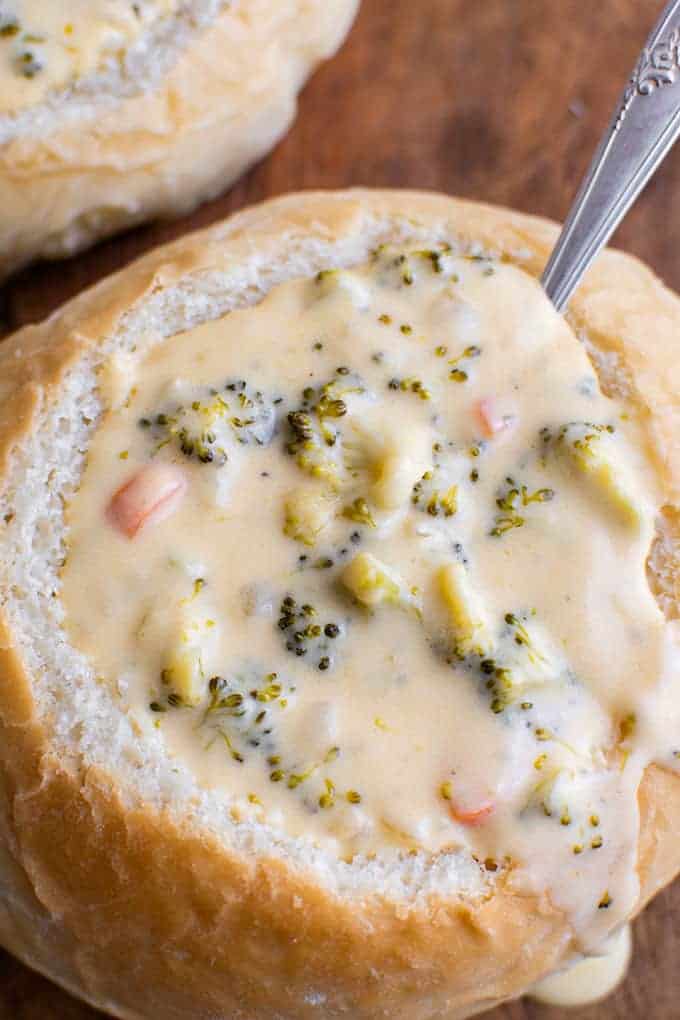
We absolutely love making these homemade bowls all fall and winter long to go with our favorite soups! I have been waiting for months to share this recipe with you guys, you’re going to love it! Bread making is something I started doing about 10 years ago, and have perfected my recipes over time to make them easy for you at home. Don’t be intimidated by working with yeast, it’s so simple, and I am walking you through the process. These bowls are really easy, and you probably already have the ingredients on hand to make them! They come out with a perfect crust on the outside and a nice dense but soft center perfect for holding in warm soups! My favorites to pair with these bowls are our Broccoli Cheddar Soup, a creamy Crockpot Potato Soup, and a good thick Beef Stew!
How to Make Bread Bowls:
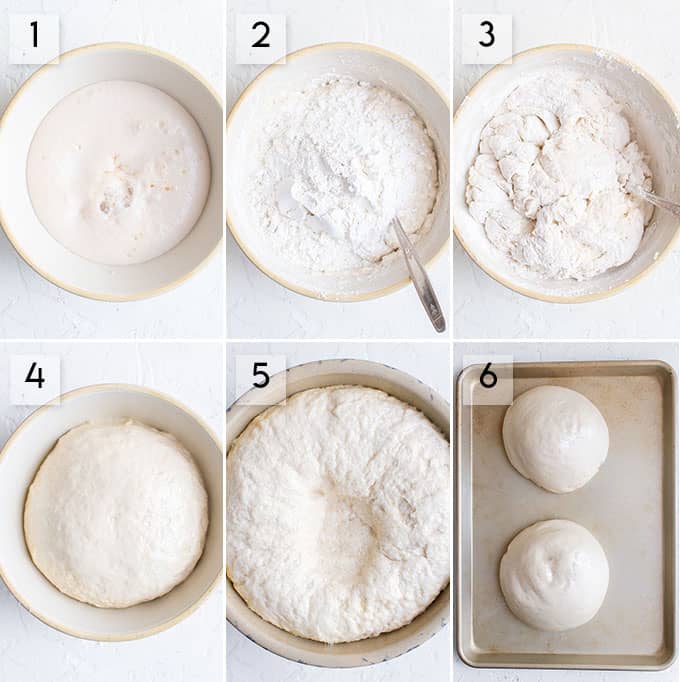
- First things first, you need to activate your yeast and let it proof. You’ll use warm water (not hot) and stir in the yeast, then allow it to sit for 5 minutes. You can see in the first picture below that the mixture should be nice and foamy. If it isn’t foamy, your yeast is most likely old and you will need to get new yeast and try again.
- Next we’re going to add in melted butter, which gives the bread some great flavor! We also toss in the salt, and flour. You can use all purpose or bread flour for this recipe. You will need 5-7 cups of flour for this recipe. Start by adding 5, then add more as needed if the dough is too sticky.
- Now, you will want to stir the flour mixture with a large wooden spoon (or your stand mixer with paddle attachment). It may get tough to stir, but get it as combined as you can. Then, you will turn out the dough and knead on a floured surface (adding more flour as you go if needed). You can also do the kneading portion by hand for 7 minutes, or in your stand mixer with the dough hook.
- Once the dough is kneaded, you can return it to the same bowl. Cover it with a kitchen towel or one layer of plastic wrap and let it rise until doubled. The rise time will take about 1 hour.
- Next, punch the dough down and place it on a lightly floured surface. Use a knife, pizza cutter, or your hands to separate the dough into 4 equal pieces.
- Take each piece of dough and gently roll it on the counter, and tuck the edges in so that you have a smooth surface. Then, grab two baking sheets, grease with non-stick spray and place two bowls on each sheet. At this point, you will cover and allow them to rise for one more hour. Once they have risen a second time, you can bake for 13-15 minutes, and serve as soon as they’re cool enough to handle!
Bread Bowl Recipe Notes and Tips:
- This recipe calls for active, dry yeast! Make sure you are using regular, and not instant.
- A great tip to speed up the process of rising the dough! Simply preheat your oven to 250 degrees, then turn it off. Place your dough ball (in an ovenproof bowl) into the oven. This will save you about 30 minutes of rise time.
- You can make these bowls ahead of time and freeze for later! I like to bake them first, allow them to cool, then wrap tightly in plastic wrap or foil. Place the wrapped bowls in a zip top bag and freeze for up to 2 months. You can thaw them on the counter before using.
- If you are worried about your bread bowls getting soggy, make sure not to fill them until right before you eat! Another tip, bread bowls really work best with thick/creamy soups. A thinner soup like chicken noodle for example will likely make the bowl soggy faster.
- Like I mentioned above you can use all purpose flour, or bread flour for these bowls. They both taste great and produce a great bread, the difference is that bread flour will give you more of a chewy texture.
Enjoy!
~Nichole

Homemade Bread Bowls
Ingredients
- 2 Cups Warm Water
- 2 Tablespoons Active Dry Yeast
- 2 Tablespoons Granulated Sugar
- 1/3 Cup Butter melted and slightly cooled
- 2 teaspoons Salt
- 5-7 Cups All Purpose Flour or Bread Flour
- Optional: 2-4 tablespoons of butter cold for topping the loafs
Instructions
- Pour the water into a large bowl and sprinkle in the yeast and sugar and stir to combine.
- Cover with a large towel and let it foam up for 5 minutes.
- Remove the towel and add the melted butter and salt and stir to combine.
- Add 5 cups of flour to the yeast mixture and stir to combine.
- Sprinkle ¼ cup of the flour onto a counter or a smooth surface.
- Scoop the dough out onto the counter and knead for 7 minutes, adding a sprinkle of flour every time it gets too sticky to handle.
- Tuck in the edges and return the dough to the bowl.
- Cover with a towel and let it rise for 1 hour in a warm place. (If you are already using your oven, set it on top of the stove, or place it on top of a dryer that is running.
- After the dough has risen, prepare two large baking sheets by spraying them with non-stick spray. Then set them aside.
- Punch the dough down and separate it into four equal pieces.
- Tuck in the edges of each portion to form a smooth surface on top.
- Add two of the uncooked loafs to each baking sheet, cover again and let them rise for another hour.
- Ten minutes before the second hour is up, preheat the oven to 425 degrees Fahrenheit.
- Once the dough has risen, add one pan to the oven and bake for 13-15 minutes, or until the top and sides turn a light golden color, or they reach your desired doneness.
- Remove from the oven and bake the other loafs.
- Once the loafs have cooled for 5 minutes, add a thin slice of butter to the tops of the loaves and let the butter run down the sides.
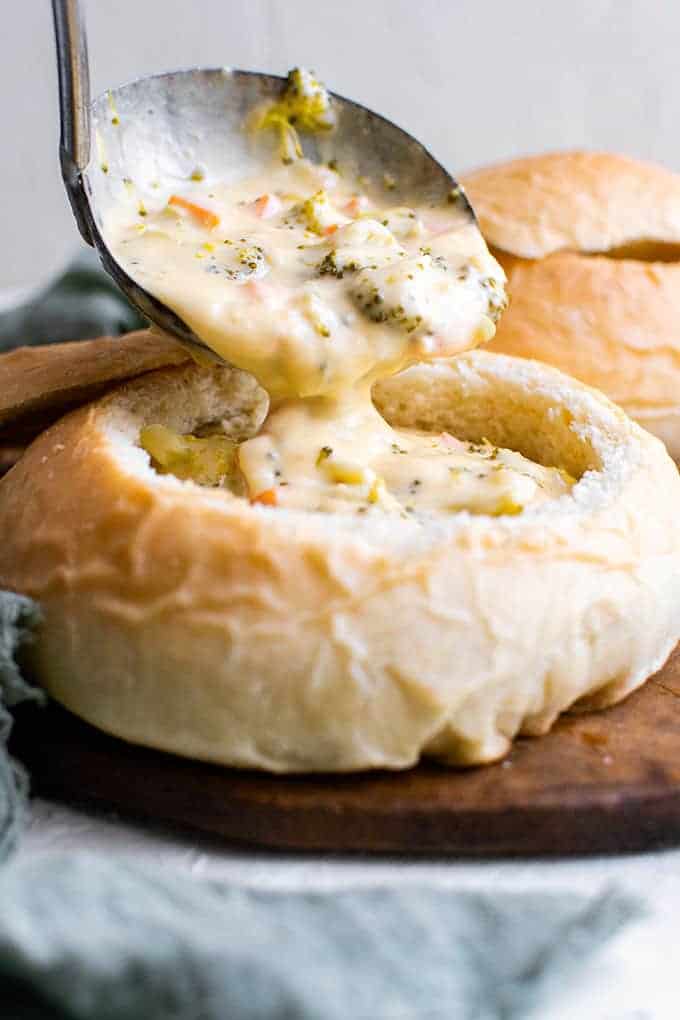
- Once the dough has cooled enough, cut off the tops of the bread and hollow out the bowl, being careful not to punch a hole through the bottom.
- Then fill with homemade broccoli and cheddar soup or your preferred soup and serve!
Notes
These loafs can be stored, uncut and without the melted butter on top, in an airtight container for up to 7 days. Or, you can store them tightly wrapped in the freezer for up to 2 months. Thaw on the countertop overnight before using.
Nutrition
Nutrition information is automatically calculated, so should only be used as an approximation.


This is such a yummy idea. I am looking forward to trying it with my signature Cream of Chicken soup.
Turned out perfect. My guy was really impressed. Easy to make. I already had everything I needed. And it only made four, which was great. I really didn’t need more than that.
Great recipe: thanks!
What soup is pictured in the recipe?
Hi! It’s our broccoli cheddar soup you can find it here https://thesaltymarshmallow.com/broccoli-cheddar-soup/