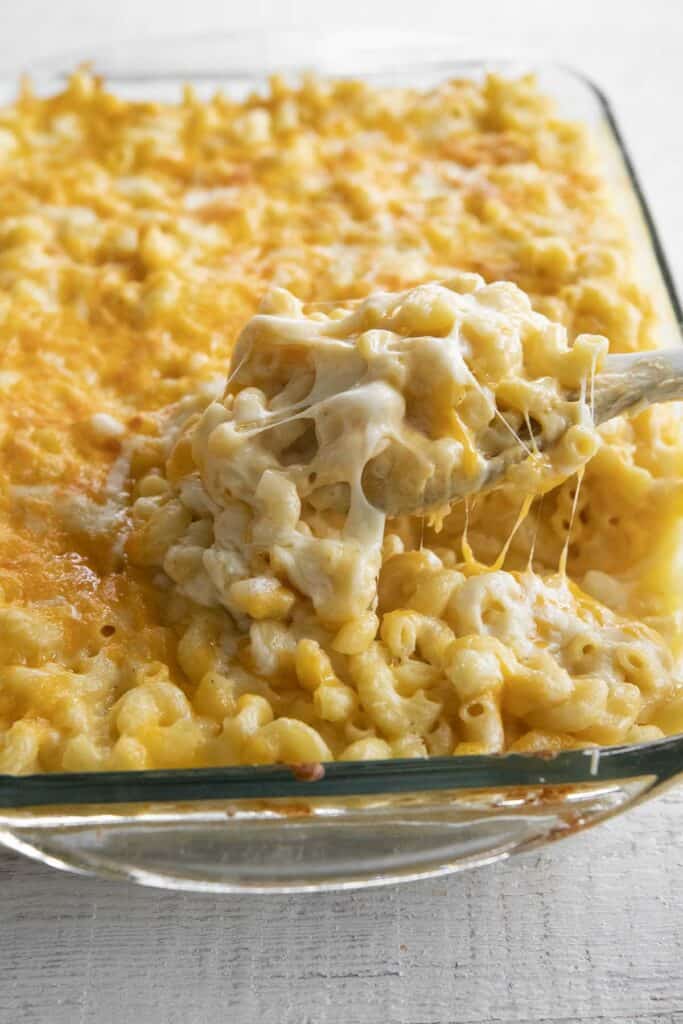
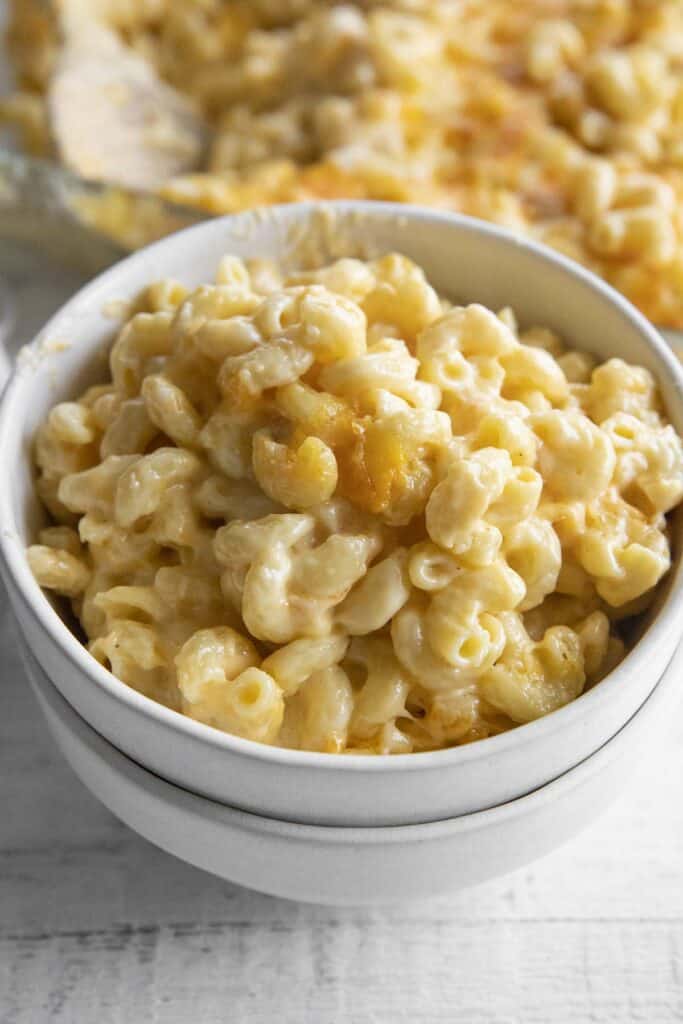
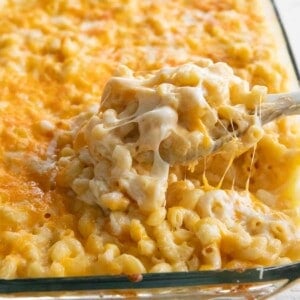
Baked Mac and Cheese is tasty, rich, and so quick and easy to make from scratch! Learn how to make a delicious, amazingly cheesy macaroni and cheese that is sure to become a family favorite!
What are the Three Best Cheeses for Mac and Cheese?
A combination of three cheeses is an absolute must for the best, most flavorful macaroni and cheese! We love to use Sharp Cheddar, Gruyere, and freshly shredded off the block Parmesan! This is the same combo I have been using for years now when perfecting this baked mac and cheese recipe. These cheeses give great flavor, but they also melt down perfectly so your mac and cheese is super creamy and gooey! It’s an absolute favorite for holidays, but it’s so easy you can really make it any day of the week you want something extra special. If you’ve been around you know how much I love mac and cheese and our Instant Pot Mac and Cheese and Stove Top Mac and Cheese are also simple favorites.
Is it Better to Bake Mac and Cheese Covered or Uncovered?
There is no need to cover this while it bakes! You make a simple cheese sauce and stir it in with the cooked noodles, then just layer in your extra cheese and bake! Covering risks your top layer of cheese getting stuck to the foil. We only bake for about 15-20 minutes until it’s bubbling and the top layer of cheese is nice and melty. You can however bake it longer if you prefer more of a golden crust.
How to Make Baked Mac and Cheese:
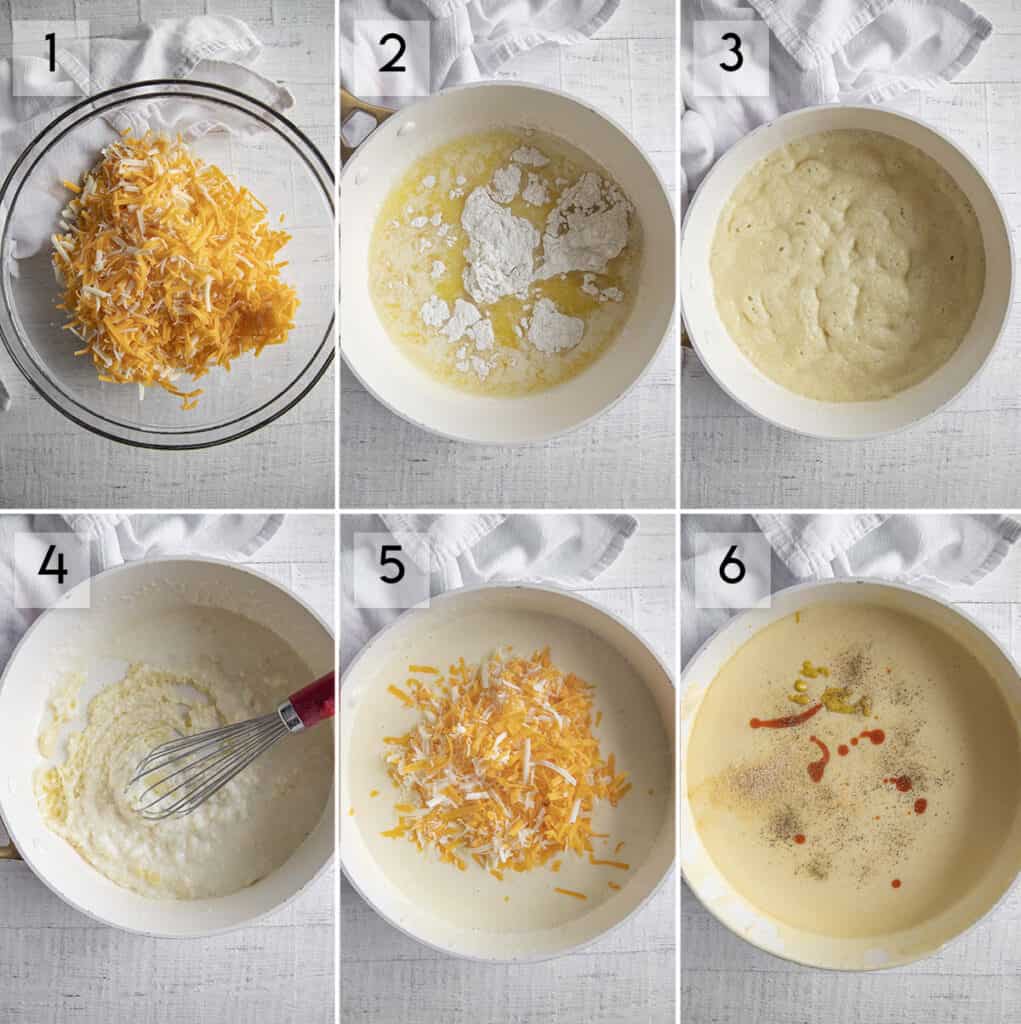
- The first thing you’ll want to do is shred up your cheese. To be most efficient I like to get my water boiling for the macaroni and cheese first, then while I wait I shred. Shred up all of your cheeses and combine them and toss together in a large bowl. Then once your water is boiling, add your macaroni and start making your sauce.
- For the sauce, melt the butter in a large skillet. Once it is melted and starting to bubble, sprinkle over all of the flour all at once. Leave the heat on medium for this whole process.
- Now, whisk the flour and butter mixture constantly for two minutes. It will kind of start to bubble up as you see in the photo below and that’s fine! Just make sure to cook it for the full 2 minutes to get out any strong taste of flour.
- Next, go ahead and whisk in your milk and cream GRADUALLY. This should take you about 1-2 minutes to whisk all of the liquid in. I personally mix the milk and cream together in a large measuring cup to make things easy. The mixture will be thick and pasty at first, but start to come together and thin out. Continue to whisk constantly for 2 more minutes after all of the milk/cream has gone in.
- Now, and super important is to remove your pan from the heat and then add in the cheeses. At this point you will gradually whisk in 4 cups total, doing 1-2 cups at a time. If you have a few lumps of cheese that doesn’t melt, that is ok!
- Lastly, before we mix everything together we season our sauce! It is so important to season your cheese sauce. I use salt, pepper, dijon mustard, a dash of hot sauce, and garlic powder. Now, you will mix your sauce with the macaroni, layer in the remaining cheese and bake!
Baked Mac and Cheese Recipe Notes and Tips:
- Making Ahead: You can make this ahead as directed without baking. Cover with foil or a tight fitting lid and refrigerate for up to two days at the most. Then, bake as directed. It is important to note that when making ahead the mac and cheese will not be as creamy as when you bake it right away.
- Important Cheese Note: This is one of those recipes where it is a must to use freshly shredded cheese off of the block! Bagged/pre-shredded cheeses often contain fillers and they don’t melt down and can become lumpy.
- Other Types of Cheese: You can also use mild cheddar if you don’t prefer sharp! You can skip the Gruyere (it can be pricey) if needed and use all sharp cheddar and parmesan. Or, you can use provolone, mozzarella (more stringy/stretchy), or even colby jack or pepper jack will work.
- Notes on Seasoning: I’ve had lots of questions in my other posts on the hot sauce/mustard combination. This is an old trick that will add tons of flavor and that nice extra cheesy “bite” to your mac and cheese! Please don’t skip it! I promise it will not make your mac spicy and it will not taste of mustard either, just gives a good flavor boost!
- Cooking the Macaroni: I personally recommend cooking your noodles about 2 minutes less than the package directions for this recipe. Since it’s going in the oven, the pasta will continue cooking in there and you don’t want it to become too soft.
- Another Macaroni Note: DO NOT rinse your noodles after draining, you want them hot! Also, do not butter or add oil to the macaroni before adding to the sauce! I know this can be tempting, but it will just cause your sauce to slide off and not stick to the noodles.
Enjoy!
~Nichole
Baked Mac and Cheese
Ingredients
- 16 Ounces Dried Elbow Pasta
- 8 Tablespoons Salted Butter Plus one Tablespoon for the pan
- 1/2 Cup All Purpose Flour
- 3 Cups Whole Milk
- 1 Cup Heavy Whipping Cream
- 4 Cups Shredded Sharp Cheddar Cheese
- 1 Cup Shredded Gruyere Cheese
- 1 Cup Shredded Parmesan Cheese
- 1 teaspoon Salt or to taste
- 1 teaspoon Garlic Powder
- 1 teaspoon Hot Sauce
- 1 teaspoon Dijon Mustard
- 1/2 teaspoon Black Pepper or to taste
Instructions
- Preheat the oven to 350 degrees. Grease a 9x13 inch baking dish with one Tablespoon of butter and set aside.
- *WHILE YOUR PASTA WATER IS COMING TO A BOIL SHRED ALL CHEESES AND COMBINE THEM IN A LARGE BOWL.
- Cook the elbow pasta in a large pot of salted boiling water. Cook 1-2 minutes less than called for on the package directions. Drain and set aside.
- Melt the butter in a large skillet over medium heat. Once the butter is melted sprinkle in the flour and whisk to combine. Whisk constantly for one minute.
- While continuing to whisk constantly, slowly pour in the milk and cream until smooth. Continue to simmer this mixture and whisk constantly for 2 minutes.
- Remove the pan from the heat (or turn heat off for gas stove) stir in four cups of the cheese (1-2 cups at a time) until smooth. Then, whisk in the seasonings.
- Stir the pasta into the cheese sauce until well combined. Pour half of the mac and cheese into the prepared baking dish and top with half of the remaining cheese. Repeat with the remaining mac and remaining shredded cheese.
- Bake in preheated oven for 15-20 minutes until cheese is bubbly and golden.
Video
Notes
Nutrition
Nutrition information is automatically calculated, so should only be used as an approximation.


I love it 💜💚💜 thanks so much for sharing
This is my go-to recipe for all holidays! It’s become so popular that I’ve been nicknamed “the Mac and cheese girl!” Highly recommend blooming the seasonings in the butter before adding the cream and milk- the flavor is soooo rich!
I’ve made this a half dozen times and finally remembered to leave a review (the other times, my plate and I were having a delicious moment!)- I’m in agreement with the other commenter declaring this the best Mac n cheese. Originally, I was seeking something as close to the cheese-pull, ooey gooey goodness of crock pot Mac. I stumbled upon this gem, which may just be better AND a heck of a lot faster to make. Thank you so much for sharing this recipe, it’s a keeper and a great recipe to make with kids and/or inexperienced cooks!
Thank you for coming back to leave a review! 🙂
This recipe is easy to make, well seasoned and really delicious.10/10 I WILL make it again.
Easily the best Mac’n Cheese I’ve ever had, it was perfectly cheesy and seasoned. It’s easy to make and would be perfect for something like thanksgiving.
I don’t normally leave reviews, but just had to for this one!! Made this for a family bbq and it was AMAZING!! Everyone raved about how good it was from the picky 4 year old to Grandpa. I didn’t add hot sauce bc of the kiddos and instead added a little paprika. Will be making this again, and again, and again!
Four Stars is what I’m willing to give this recipe BEFORE I even make it and share it with my “buds!!” so that’s really saying something because even though it’s noon, I had a late brunch-which! I can’t wait to make this with the recommended blend of cheeses and a side of Texas Toast!