Funfetti Oreo Krispie Treats are exactly as magical as they sound! This is a no bake recipe that features 5 inexpensive ingredients and requires just 10 minutes of your time. Sweet, chewy rice krispie treats are made more fun with the perfect amount of sprinkles and golden Oreos!

Funfetti Oreo Krispie Treats
Oh, the many joys of funfetti! These easy no-bake rice krispie treats are perfect for birthday parties or any other cause for celebration. Honestly, I make them all the time – no special oocasion needed. I love that I can whip them up with my kids! There’s something about rainbow sprinkles that makes them want to get in the kitchen and help. Plus, the addition of golden Oreos sends them right over the top. They add a nice crunch to compliment the gooey marshmallows and rice krispies. Marshmallows, sprinkles, rice krispies, golden oreos and just a touch of butter – this no fuss recipe has so few ingredients and so much to love!
Enjoy more of the very best homemade rice krispie treats like Fruity Pebbles Rice Crispy Treats and Salted Caramel Apple Krispy Treats!
How to Make Funfetti Oreo Rice Krispie Treats
- Prepare ingredients. Crush the Oreos and set them aside in a bowl with 4 cups of cereal.
- Create the marshmallow mixture. This is what holds it all together, so measure with care! Heat marshmallows and butter in a medium pan over medium heat. Stir and melt until almost no lumps remain.
- Mix to combine. Turn off the heat. Pour the cookie and cereal mixture into the pan and add sprinkles. Stir it all together to thoroughly combine.
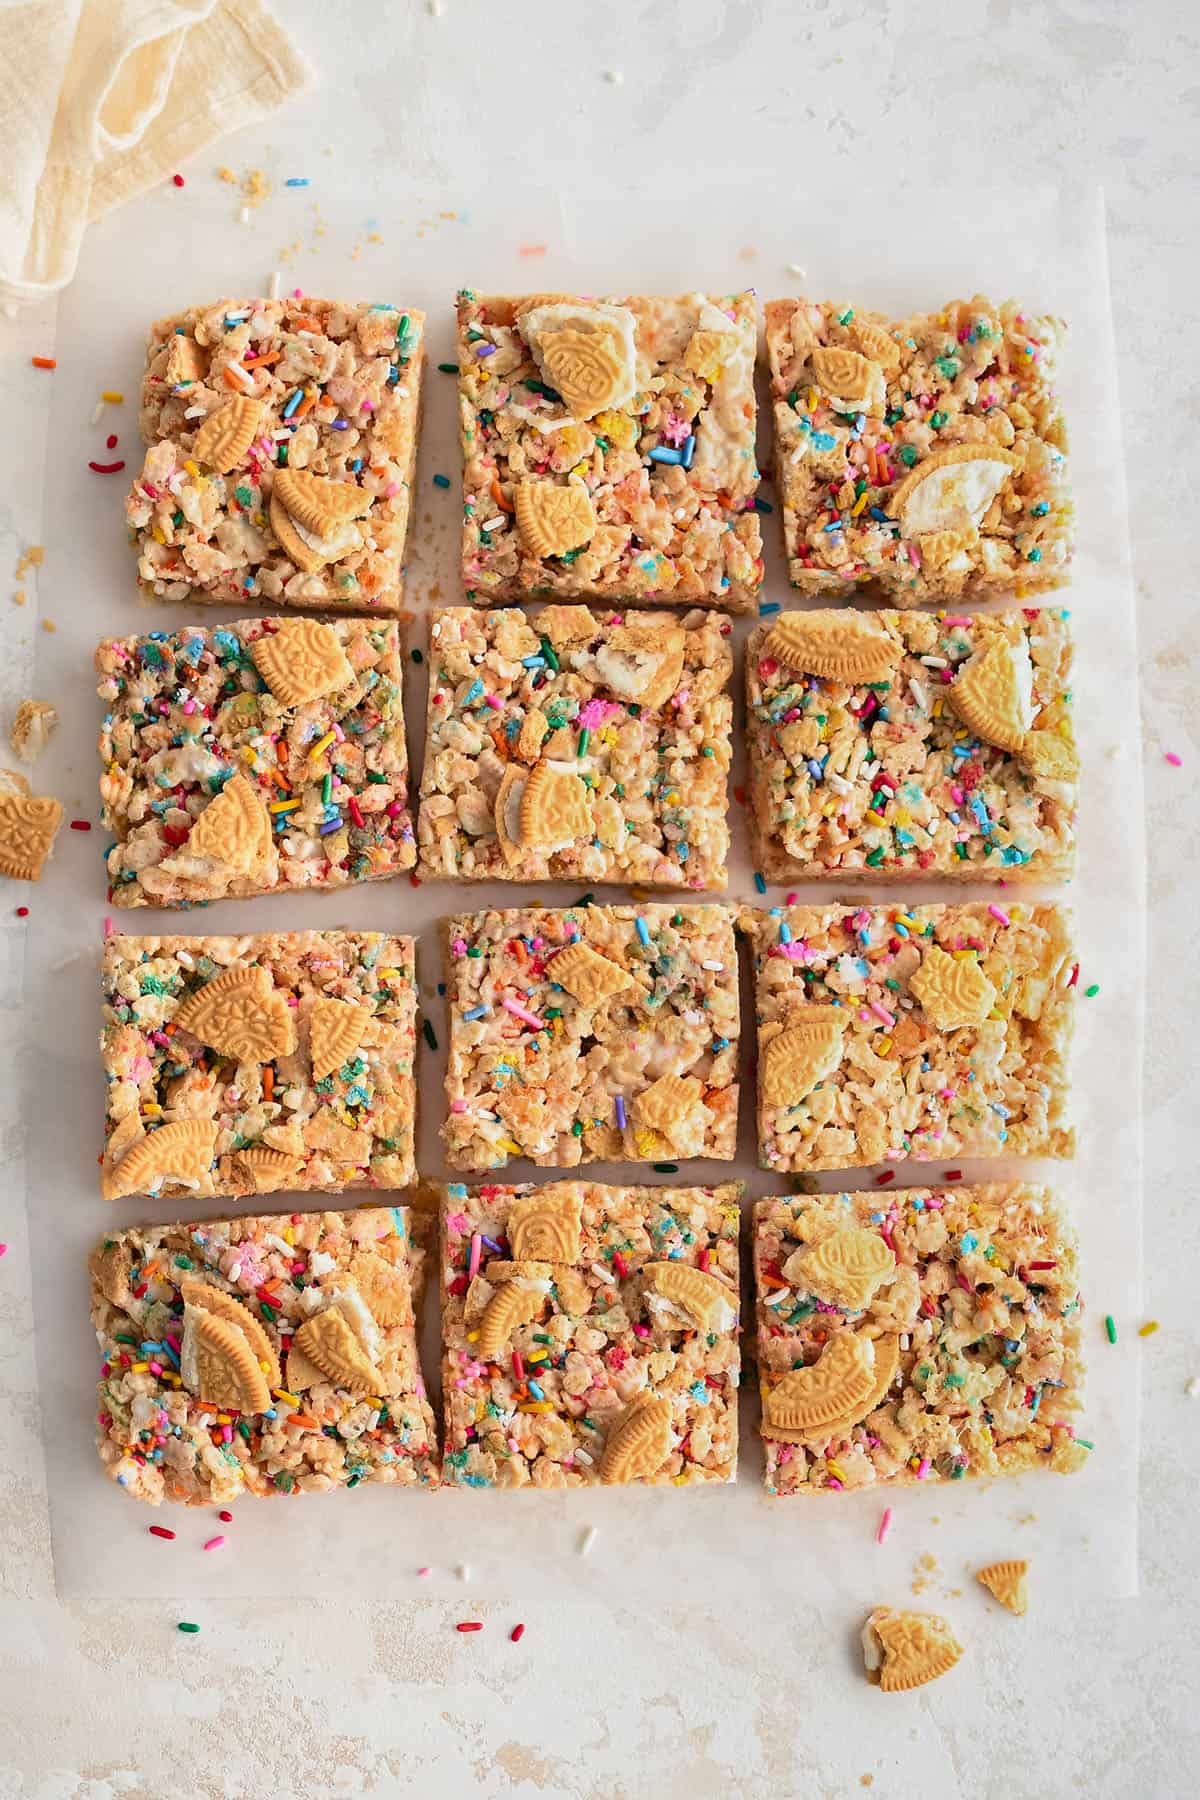
- Assemble. Pour the mixture into a pan. Let it cool, then top with extra cookies and sprinkles. Slice and serve or store for later. Enjoy!
Storing for Later
Store your funfetti rice krispie treats in an airtight container at room temperature for up to 3 days. To keep them from sticking to each other, you can place a small sheet of parchment paper between each treat.
You can also freeze your Oreo rice krispie treats for about 4-6 weeks. Don’t forget to date and label! When you’d like to enjoy a treat, just let it come to room temperature on the kitchen counter for an hour or so.
Ingredient Notes
- Rice Krispie Cereal – You can use the name brand or generic. And if you have any left over, use it to make some Scotcharoos!
- Golden Oreo Cookies – You can swap these with regular Oreos if you’d like. There are also so many different Oreos to choose from these days, so feel free to get creative. Comment below and let me know what worked for you!
- Mini Marshmallows – These melt down a lot faster than regular sized marshmallows.
- Butter – I like to use unsalted butter, but you can use salted if you like a little salty-sweet combo.
- Sprinkles – Rainbow sprinkles (the regular ones, not nonpareils) create that signature funfetti look. You can of course swap them with any other sprinkles you have on hand. Use red white and blue ones for the 4th of July or red and green ones for Christmas!

Funfetti Oreo Krispie Treats
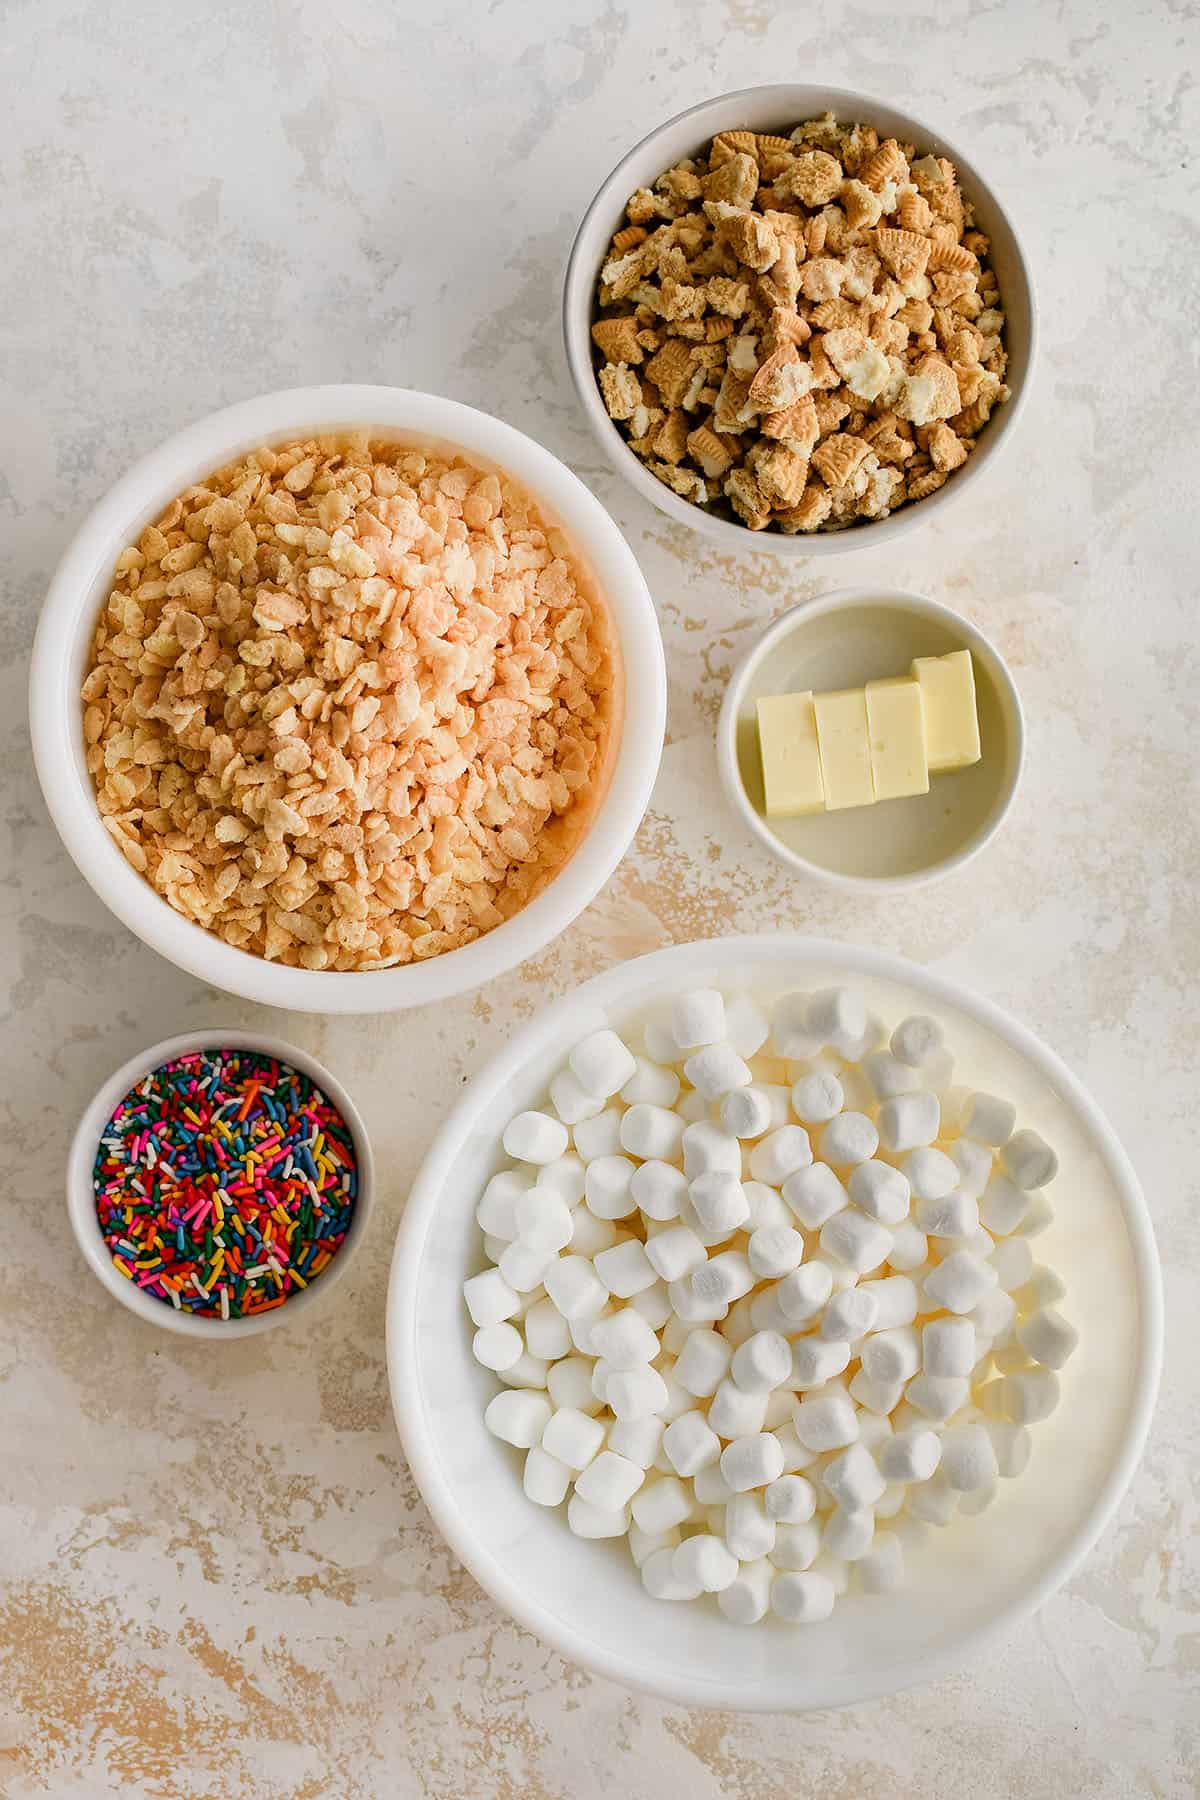
Ingredients
- 4 Cups Rice Krispie Cereal
- 2 Cups golden oreo cookies crushed
- 4 Cups mini marshmallows or 40 large marshmallows
- 4 Tablespoons butter
- 1/3 Cup sprinkles
Instructions
- Pour crushed Oreos into a large bowl, with the 4 cups of cereal, set aside.
- In a medium sauce pan, heat the marshmallows and butter over medium heat until almost no lumps remain.
- Turn off heat and pour cookies and cereal into marshmallow mixture.
- Pour sprinkles into cookie/marshmallow mixture.
- Stir to combine.
- Press mixture into pan and allow to cool.
- Top with extra cookies and sprinkles if desired.